Thursday, January 23, 2014
Top meet Bottom
I finished constructing the components for the undercarriage:

I removed the middle part of the bases to give each end two feet instead of just one long base. I think this will stabilize it a bit more by forcing the support outwards.

Then I bolted that sucker down with some lag screws...

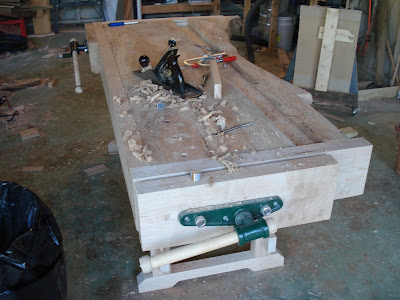
...and look what I had:


I said previously that I would better explain my wedged tenons down on the base. I think this picture does a better job explaining than words could:
 The wedge and its mortise have the same taper so that when you drive the wedge down it pushed against the leg and pulls the stretcher into its mortise nice and tight. Very sturdy and easy to disassemble.
Youll also notice dogholes in the benchtop now. Into these holes you place a dowel-like object called a benchdog and do the same thing with the doghole in the vise. This allows you to effectively turn the whole workbench into a clamp. This is useful for assembling large objects and holding larger boards for planing. Heres a shot showing the benchdogs in place:
 If I place a board between the dogs and tighten the vise, the board will be held in place.
I used the method Lee Valley recommends for boring dogholes for their benchpups: I made a jig whereby each hole references off both the edge of the benchtop and the previous hole:
 This ensures nice and even spacing.
So now I have a nice surface on which to work. But dont think the work here is finished: there are still a lot of finishing touches to go on my bench to get it to where I want it. For example, Im ready to admit defeat on that corner opposite the face vise. The fourth picture I posted today really shows how hopelessly out of plane it is with the rest of the bench. I was thinking about drilling some holes in it for chisel storage...well see. At the other end of the bench is that area of the waney edge that I cut out. Here I plan to make a little rack for handplane storage. Im looking forward to seeing how that will work out. There is also the drawer situation...not sure what to do about that yet.

I removed the middle part of the bases to give each end two feet instead of just one long base. I think this will stabilize it a bit more by forcing the support outwards.

Then I bolted that sucker down with some lag screws...

...and look what I had:


I said previously that I would better explain my wedged tenons down on the base. I think this picture does a better job explaining than words could:

Youll also notice dogholes in the benchtop now. Into these holes you place a dowel-like object called a benchdog and do the same thing with the doghole in the vise. This allows you to effectively turn the whole workbench into a clamp. This is useful for assembling large objects and holding larger boards for planing. Heres a shot showing the benchdogs in place:

I used the method Lee Valley recommends for boring dogholes for their benchpups: I made a jig whereby each hole references off both the edge of the benchtop and the previous hole:

So now I have a nice surface on which to work. But dont think the work here is finished: there are still a lot of finishing touches to go on my bench to get it to where I want it. For example, Im ready to admit defeat on that corner opposite the face vise. The fourth picture I posted today really shows how hopelessly out of plane it is with the rest of the bench. I was thinking about drilling some holes in it for chisel storage...well see. At the other end of the bench is that area of the waney edge that I cut out. Here I plan to make a little rack for handplane storage. Im looking forward to seeing how that will work out. There is also the drawer situation...not sure what to do about that yet.
Subscribe to:
Post Comments (Atom)
No comments:
Post a Comment