Friday, February 21, 2014
My Take on Starting to Carve Part Two

Back when I was young and eating art classes with a ravenous appetite, I always disliked when we the class would head into mixed media sculpture land. Making three dimensional representations of this weeks existential dilemma wasnt exciting (I know, I know, how ever did I end up with an avocation towards woodworking? I can sum that up in a word, UTILITY) My love was drawing, painting to some extent, but mostly drawing. Taking a flat space and making the thoughts and ideas spring off the page into the air was much more satisfying than creating something that was already toddling around its emotional baggage in real space and time.
So when I was starting to be drawn towards carving, I was not tempted to turn a chunk of bass wood into a pink elephant with polka dot pants and sad looking eyes. I sought to recreate that drawing experience on the flat surfaces of my work. Only instead of a pencil or charcoal stub, I would use sharp chisels to draw with shadow and light.


The carved elephants and garden gnomes of the world look the same all throughout the day. put them in direct light, put them in shadow, it makes little difference. But have a piece of chip carving or the like in your room and it will look different through out the day. Whether its the morning light striking it face through the window or the dim shadowed photons of your bedside reading lamp in the evening. The carvings have a different personality depending on where the light is. They tell a different story in different apertures. It makes them challenging to photograph too.
So if you are attracted by carving styles other than mine, my advice is to find an experienced instructor whose work speaks to you and flatter them through mimicry. But dont just recreate their finished work. That will teach you something, but not everything. Try and recreate their methods of work. Find some video of them working and study their posture, their hand holds, their rhythm. Stalk them like youre an F.B.I. profiler and theyre the next Son of Sam. As your body and muscles learn you will begin to adapt what you see into your own style of work. When you find yourself naturally moving off the script, then you are headed into your own creative space, and that should be where you want to be.

I have stolen bits and pieces from a lot of different collaborators this far down my path but I can boil down the major influences into three people.
The first is pretty obvious. Peter Follansbee. When I first found his blog and saw his carvings I thought to myself, Now theres a guy who is carving exactly the things I want to carve and doing it the way I imagined it could be done. I started on my own with my first two chisels and following both Peters words from his blog and some video people had shot of him demonstrating. I have to say in most things I find woodworking videos to be lacking but I cannot think of a different media that would translate the process of carving better than video. My first suggestion is you go out and buy Peters video "17th Century New England Carving" This video solidified the basics that I was trying to learn. It taught me how to look at a pattern and break it up into the moves I needed to reproduce the work.
This video was very important to my initial development. After getting it the next steps were to start carving like a mad man. Practice Practice Practice so they say. Peter has a second video on "S" curves in work, I dont have that one - yet - so I cant speak to it per say, Im positive its just as excellent as his first, so if you want order both, but for sure order the first one.

Then after a while I was forced from my 17th century comfort zone. A client wanted something representing the ocean carved on the inside of a box. I struggled to find a solution until inspiration made me think of a shell. I had never carved a shell before but I knew where to go to get the help I needed. I went right to the teachings of Mary May. A fantastic woodcarver who has a lot of experience working and teaching. I first became aware of her watching an episode of The Woodwrights Shop where she carved an acanthus leaf for St. Roy. Since then I have found her blog and even more of her work. She is an inspiration for me at every turn.
She has DVDs for sale on her site, and even better, shes opened an online woodcarving school that you can attend anytime. She also has an article in the most recent Popular Woodworking Magazine on carving acanthus leaves on a bedpost. Even before this article conquering the acanthus was starting to become an obsessive thought for me. Now Im going to have to stop studying and start cutting wood.
My last person is a carving hero to me because she is the master of a style I havent managed to dive into yet, but do desperately long to. Kari Hultman writes her blog over at The Village Carpenter and besides being just a sweetheart of a person in general, she is an excellent chip carver. I havent picked up a set of knives and tried it yet, (though I have been drooling over the ones Ron Hock has for sale) Ive seen Kari do a great intro to chip carving video and I always like seeing her work. I have to admit, Im not sure I would have considered chip carving if it wasnt for her.
So there are my inspirations and foundations - now go out and discover your own, they may surprise you. Next time well talk about inspiration and how I move through the carving process.
Ratione et Passionis
Oldwolf

Wednesday, February 12, 2014
Dads Benchtop Bench Part II
 |
| The milled vise jaws. |
 |
| Drilling the pilot holes for the vise screws. |
 |
| Plenty of clearance. |
 |
| Too proud. |
 |
| Being shamed into fitting. |
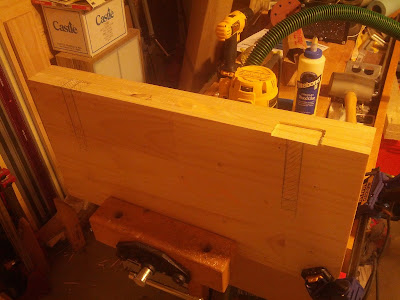 |
| I actually routed the nut clearance first. |
 |
| Ready to receive the screw. |
Monday, February 10, 2014
Making A New Turning Saw Part III
It was time to refine the shape of the new saw; making it lighter both visually and physically. Most of the work was done on the shavehorse, but some work was done over at the bench vise. The tools used were: drawknife, spokeshaves, files, and a knife. The work was slow but fun.
Heres the beginning of the shaping process on the shavehorse:

I just shaped it by eye. The hardest part was not taking off too much - its addicting!

Some sections were easier to work on at the bench with the piece held in the front vise:

I ended up taking off quite a bit of stock. The areas around the mortise and the bottom of each arm I kept close to full thickness. Here are some comparison shots between the unshaped arm and the mostly finished arm:


After shaping the two arms with rounded, curving surfaces, the stretcher looked out of place with its flat surfaces and beveled edges. I decided to rework it to more closely match the arms. Heres two shots of all three pieces, with most of the shaping work complete:


And a shot of the assembled frame surrounded by the tools that have been working on the shaping:

Next up are the tension device (easy) and the blade assembly (not too hard, except I have this new idea on how to attach the rods to the knobs without using epoxy) so maybe this will be a four part post. Probably shouldnt have said that...
Sharing the Wealth Part I
James and Jenny decided they wanted to work on some projects and I was glad to provide the shop and assistance. We’ve been having a great time of it!
Our first meeting was dinner and design. James decided to make a folding book stand and Jenny is making a necklace holder based on a shaker “key board” design. After dinner, we went out into the shop to get a little hands-on time with the tools and techniques they will be using.
Last night we were back at it, and the actual projects took flight! It was great getting to spend shop time with younger people (not that Im old or anything...) interested in learning to use handtools.
Here they are laying-out their pieces. James is using squares and a knife to mark his pine board for the chiseling and sawing that will free the two interlocking parts of his book stand. Jenny is using a marking gauge to get ready for re-thicknessing her Doug Fir with a scrub plane.


Here Jenny is scrubbing down almost to the gauge mark, and then she will finish up with a jack plane.

James is chopping and paring the hinge joints in his white pine.


And we ended up the night with Jenny doing some resawing – something she needed to do to get two parts out of one, and a small preview of James’ next step.

We had a great time, and I can’t wait until our next evening in the shop!
Thursday, February 6, 2014
A Dedicated Sharpening Bench part 6

With the frame assembly dry fit and the bench surface placed into the leg joinery, I carefully place the granite insert on top to establish its permanent location. My initial thoughts were to install it off to one side but after laying it on the work surface and imagining how it would function in daily use, I decided to center it. This decision was based on the under carriage bracing system and the drawer hanger locations. I also felt that it would be more comfortable centered while in use and may keep the bench a little more balanced. So now that I know where I want to place it I carefully lay out and scribe around the perimeter.

Once I have the lay out complete its time to start thinking about just how Im going to make this cut-out! My first thought is to use my frame saw and after drilling a pilot hole through the oak, dis-assemble the saw and thread the blade through the opening as you would on a scroll saw. I proceeded to do this and made the first long rip cut down the front of the piece but hit a wall when faced with the cross cuts. The frame saw only has a 6" throat so it wouldnt work for the cross cutting. 1" oak is a challenge at the best of times and the light blade of the frame saw was really pushing it. I decide to use my Japanese ryoba saw, this is the one without a back and has both a rip and cross cut tooth configuration. I use a brace and bit and bore a series of holes along the cut line to fit the ryoba and get things underway. In the next shot you can see the first rip cut at the rear and the holes drilled to allow the blade of the ryoba to pass through.

In a power tool shop this procedure wouldnt be a big deal, maybe a jig saw would suffice or even a table saw with the piece placed over the blade and then carefully raising it up through the work. In my shop however, a little trial and error and Ill have the cut out complete. The ryoba works its way through the oak. Some people have a hard time with pull saws binding and teeth breaking but if you dont force the cut and let the saw do the sawing, even on this hard white oak its a relatively easy task.

Its not pretty but it worked! Ill clean up the inside edges next.

Again with a nice wide chisel I carefully work my way around the area taking small bites. I begin from the underside and chop down a little more than half way. I flip the piece over and finish the job from the top where its seen. I have a corner chisel and this is a perfect application for it. These are a kind of specialty item that you could indeed live without but they do come in handy from time to time.

I dry fit the granite and note any tight spots along the edges. I mark them and remove the slab to slowly and carefully pare away the fat to achieve a perfect fit.

Now that I have the surface cut-out complete I turn my attention back down to the frame and dimension the final rear stretcher. This 2" oak is placed at the rear top and the back of the work surface will sit on it when complete. So again with the mortise chisel I chop out the cavity.

The tenons in the oak are off set to allow for the dado Ill plough out next. This groove will hold the under carriage cross pieces, both the granite insert supports as well as some drawer hangers.

My plough plane is the perfect tool for the job.

With the frame joinery finally complete, Ill start to lay out the components for the granite supports. These are made from some hardwood offcuts I had, in this case some birch and walnut and I dimension them so that when installed the granite will sit slightly proud of the surface. When I say slightly proud, I mean no more than the thickness of a standard sheet of writing paper. The back of the supports will sit in the dado we just cut into the top, rear stretcher and the front will be screwed and joined into two recesses on the underside of the front apron.
I begin as usual by laying these out.

I approach this like I would with chopping a half blind dovetail, clearly scribing the edges and the depth of the cavity. The main difference between this and a dovetail is the dovetail is usually chopped into the end grain of a board while this is running along the grain. Care must be taken to insure I dont chop too deep and split the piece. I begin my making some saw cuts to establish the outer edges and then with a chisel begin removing the waste.

In a power tool shop this procedure could be easily accomplished with a router and a jig so with that in mind Ill get mine to complete the cut-out.

Gotcha! Did you really think my router would have a plug attached? Taking shallow passes, I work my way down with the router plane until I reach my desired depth.

Then with a chisel I clean up the corners and dry fit the supports. Im looking for a nice tight fit- how tight? With the apron clamped in my face vise Im able to press the supports down into the openings and with out any support theyre able to sit proud without sagging or falling out.

Ill re-assemble the bench top pieces and dry fit the granite supports.

When Im happy with the fit and the depth of the components are well established, Ill take my awl and mark for some screw holes. I need to make all of these pieces removable for times when I want to re-surface the bench top. This is also why the front cross member on the tool tray is also removable. My vintage hand drill with a modern counter sink bit enables me to drill and countersink in one pass.

From here I begin laying out and measuring for the drawer hangers. They will also sit in the rear apron dado and are cut for a snug fit. The two inner hangers will need to be shaped to fit around the profile of the granite. I approach this as I did when removing the waste on the underside of the feet. I make a series of saw cuts to establish the depth and then chisel out the waste.

In the next shot you can see the shaped drawer hanger in the fore ground and the side example in the rear. These will also recieve a dado for the drawers to hang in.

To add some added insurance that all of these pieces do what Im hoping theyll do (and thats holding a heavy granite slab and two drawers tightly to the bottom of my workbench) Ill add some pocket hole screws that will secure it up into the bench top. A pocket hole jig is a useful tool in the hand tool woodshop but is usually associated with power tools.

Here, with a special bit chucked into my brace I can easily drill the holes and am ready for a final dry fit. You may notice at this point I only had two of the four drawer hangers installed; truth be told I wanted to see if this system would work and when it did I went back and made the two for the left hand drawer.

I was planning on showing the frame glue up in this post but looking at its length I think Ill save it for the next one-
cheers!
Tuesday, February 4, 2014
the dome part 2


